December 26, 2021 Norwich, UK Snoopy Christmas Quilt cotton· FinishedProjects· General· General Information· quilt· snoopy. peanuts·
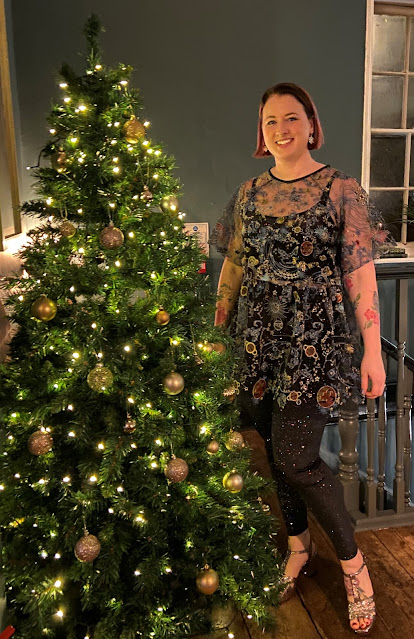
December 19, 2021 Norwich, UK A Festive Journee - McCalls 8110 festive· FinishedProjects· General· General Information· glitter· glitter jersey· journee· McCalls· mccalls 8110· sheer· stars· tulle· wardrobe·
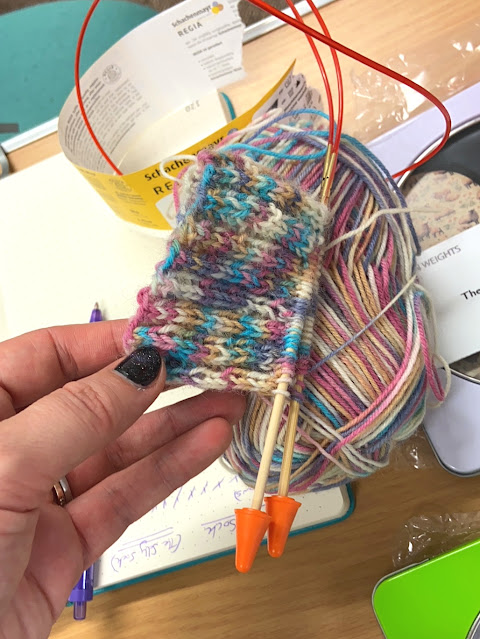
December 5, 2021 Norwich, UK The Sally Sock craft· FinishedProjects· General· General Information· knit· knitting· learning· sally socks· socks· the sally sock· wardrobe· wool· yarn·
November 14, 2021 Norwich, UK Style Arc - Loren and the Lizards Jacket blazer· dinosaur· fabworks online· FinishedProjects· General· General Information· jacket· lining· lore· loren jacket· minerva· style arc· tweed· wardrobe· woven·
October 31, 2021 Norwich, UK Halloween Glee - Style Arc FinishedProjects· General· General Information· glee· glee knit top· glee top· halloween· knit· lamazi· lamazi fabrics· ottoman knit· ribbed knit· sewing with stretch· stretch· style arc· wrap· wrap top·
October 24, 2021 Norwich, UK Knit for Victory - Pigeons! bill· bill the pigeon· birds· FinishedProjects· General· General Information· knit· knit for victory· knitted birds· knitting· learn· pigeon· pigeons· wool· yarn·
October 17, 2021 Style Arc - Parker Ponte Pants Party FinishedProjects· General· General Information· minerva· pants· parker ponte pants· ponte pants· ponte roma· secret pyjamas· stretch· style arc· trousers·