

You will need:
- Main fabric
- Lining fabric (optional)
- Interfacing
- Zip
Step 1
You're going to need 2 giant pieces of main fabric. The width is not an exact science. My floral one was 125 cm and this one - I was restricted by the print direction - was 105 cm. The length will be how long you want your skirt - waist to knee measurement. If you are lining the skirt - cut 2 rectangles exactly the same in your lining fabric.


You will also need 2 strips for the waist band (1 is the outer waistband, 1 will be the facing). This is 9cm wide and waist measurement + 3cm long (3cm = 1.5cm each side seam allowance). If you feel the need - interface the main waistband piece for stability.


If you're after some pockets - trace some rough pocket shapes (or use another pattern to copy) and cut 4 pieces.
Step 2
To the folding! Find the centre point of your fabric and mark across the top edge. Using this centre point you need to mark 10cm increments. The first increment will span the centre point - so 5 cm either side of it. Mark those points 1. Continue each side to mark 3 more at 10 cm intervals; 2,3, 4.
 To create the pleat, fold point 2 to meet point 1 and pin. Fold point 3 to point 4 and pin - on both sides. Press in the pleat and baste across the top of the fabric. Repeat this with the lining fabric.
Step 3
If you don't want pockets, you don't need to follow this next step as you're zip can just go up a side seam. HOWEVER if you want pockets - you can't have the zip and the side, it needs to go in the back. Take one of your main fabric pieces and cut in half, up the centre line to create 2 back pieces. Repeat with the lining.


Step 4
Shape the skirt. The front piece needs to be calculated at : (waist measurement/2) + 3cm seam allowance.
In the example the waist measurement is 74cm. (74/2) + 3 = 40cm.
Using the centre point for equilibrium - mark that measurement across the top. e.g 40cm - with 20cm either side of the centre point.


Draw a curve from the end point of the new measurement, down to the outer edge of the skirt - making it more skirt like! Repeat with the lining.
For the back pieces - use this calculation: (waist measurement/4) + 3cm
e.g (74/4)+3 = 21.5cm


Again, using the centre line (now where you cut in half), mark that measurement and again draw a curve down to the bottom outer skirt. Repeat for the lining. Cut!

Step 5
Measure 10cm down the side seam and lay out your pocket pieces, right sides facing on both the front main fabric, and back main fabric pieces. Stitch about 3mm in.


Turn the pockets outwards, place your skirt pieces right sides together and sew up the side seams going all around the pockets.

If you are doing a lining - just place right sides of lining together and join up the side seams.
You now have a giant skirt piece!
Step 6
Attach the waistband to the main fabric skirt piece - do the same with the waistband facing and lining.

Step 7
Insert the zip into the main fabric skirt piece. I have a tutorial on how to do a concealed zip here if you need it. Then close up the skirt by finishing the rest of that seam! Press it.

Step 8
Nearly there.....
Take the lining piece and drop the main fabric skirt piece inside it - lining up the seams. Pin around the top of the waistband and facing AND down the edge of the rear of the zip tape. Stitch all the way around. If you flip everything right sides out now it should all be neatly finished and encased. Finish closing the lining back seam up to the zip tape - you might need to hand stitch bits of this if there are gaps. Give everything a good press.
 To keep the facing and waistband from riding up, stitch in the ditch around the waistband to hold it together with the facing on other side. (I didn't do this as the skirt if for a friend - left it open in case any adjustments needed to be made!
Step 9
Hem it all and give it a final press!! Put it on, open the wine, kettle on - enjoy.


I hope this is of use to you - if you use the tutorial I'd love to see some pics of what you made - do email me any pictures and details :) OR we could get all modern on Instagram with #craftyclydemidiskirt ;-)
Feel free to comment and come and say hello on Instagram, Facebook, Twitter, Pinterest and Bloglovin too :-) xx

Step 5
Measure 10cm down the side seam and lay out your pocket pieces, right sides facing on both the front main fabric, and back main fabric pieces. Stitch about 3mm in.


Turn the pockets outwards, place your skirt pieces right sides together and sew up the side seams going all around the pockets.

If you are doing a lining - just place right sides of lining together and join up the side seams.
You now have a giant skirt piece!
Step 6
Attach the waistband to the main fabric skirt piece - do the same with the waistband facing and lining.

 |
| Main fabric with waistband |
 |
| Lining fabric with waistband |
Insert the zip into the main fabric skirt piece. I have a tutorial on how to do a concealed zip here if you need it. Then close up the skirt by finishing the rest of that seam! Press it.

Step 8
Nearly there.....
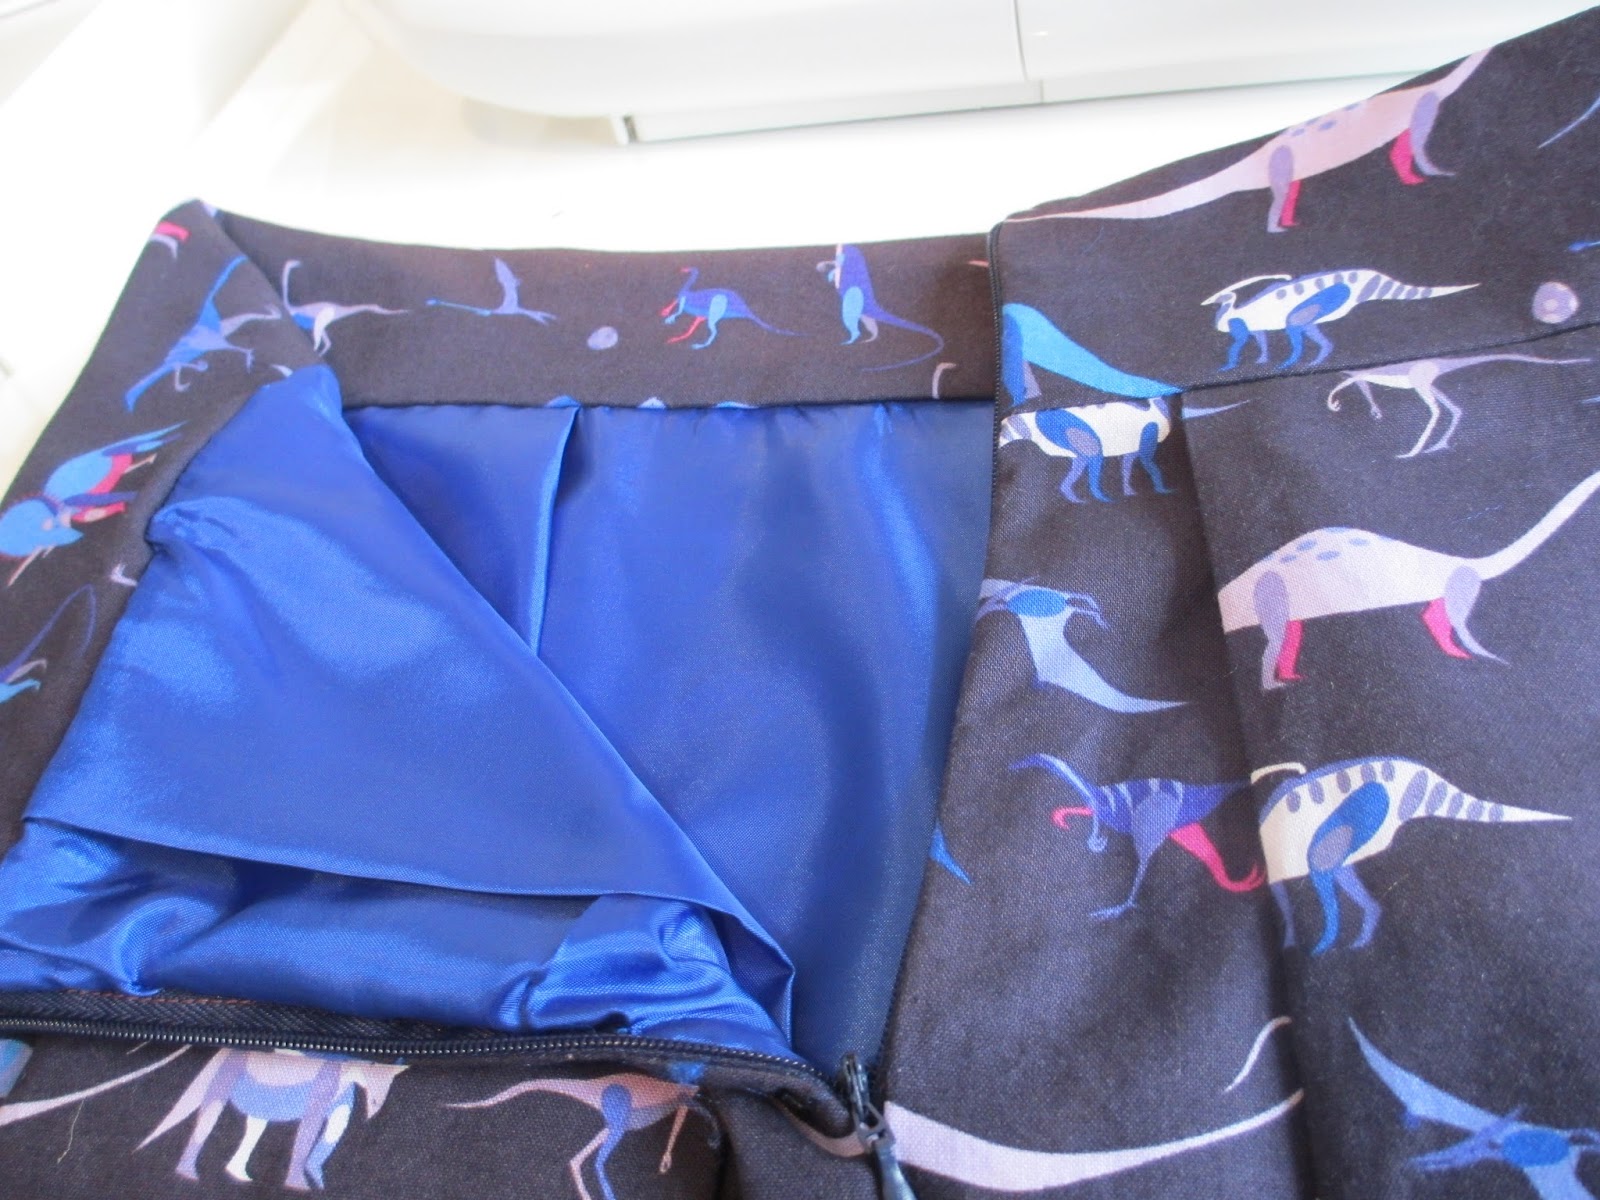
Take the lining piece and drop the main fabric skirt piece inside it - lining up the seams. Pin around the top of the waistband and facing AND down the edge of the rear of the zip tape. Stitch all the way around. If you flip everything right sides out now it should all be neatly finished and encased. Finish closing the lining back seam up to the zip tape - you might need to hand stitch bits of this if there are gaps. Give everything a good press.
 |
| pin all way and down the back of zip tape to sew in lining |
 |
| turn right side out and press waistband |
 |
| close the lining back seam up to end of zip |
Step 9
Hem it all and give it a final press!! Put it on, open the wine, kettle on - enjoy.


I hope this is of use to you - if you use the tutorial I'd love to see some pics of what you made - do email me any pictures and details :) OR we could get all modern on Instagram with #craftyclydemidiskirt ;-)
Feel free to comment and come and say hello on Instagram, Facebook, Twitter, Pinterest and Bloglovin too :-) xx


Great tutorial! Think I'll have to give box pleats a shot now :)
ReplyDeleteThank you! x
DeleteAwesome tutorial! Love the pockets...and the material. It almost looks like it could be reversible too! Do you have any suggestions if I want to skip the zipper (because I'm lazy and scared!)? Like maybe using ties as a means of tightening it so it could have a pretty bow at the waistband?
ReplyDeleteDon't fear the zipper! But if you wanted to skip you could make it elasticated instead. This would be very simple as you dont need to shape the waist or have seperate back pieces, you just keep the fabric as 2 big rectangles! So long as the width of the fabric (pleated) goes over your hips you can then just pull it on if there's elastic in the waistband.x Let me know how it goes!
DeleteLove this! I've just bought fabric to make it myself :)
ReplyDeleteFantastic! I hope you enjoy it - be sure to send me a pic :-)
DeleteI'm thinking I like the way you did the hip and waist area. Less chance of it having a bunching look around the hips and waist. I going to give it a try. Thank for your clear understandable tutorial.
ReplyDeleteNo problem, yes the shape makes this a lot less bulky :)
DeleteThis was the impetus I needed to do this skirt! Have the fabric and now to sew. I do hope it turns out as well as yours. Thank you for a wonderful tutorial.
ReplyDeleteHave a great time making your skirt, would love to see the result :)
DeleteThat's ADORABLE!! I just got my first sewing machine--are they easy enough for me to start with?
ReplyDeleteSure just go for it! The best way to learn is just to try...
Delete